
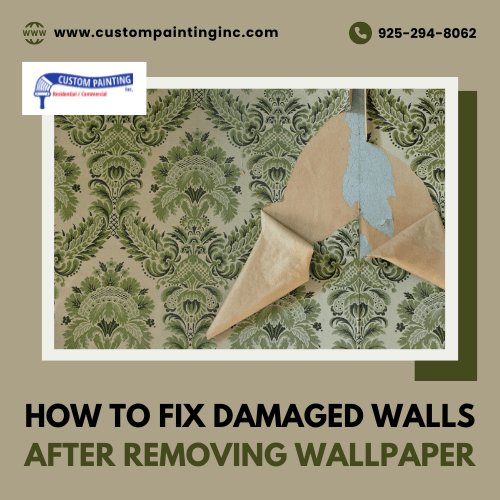
When you remove wallpaper, it often leaves your walls looking less than perfect. Scratches, gouges, and adhesive residue are common issues that need attention before you can paint or apply new wallpaper to a Concord, CA area home. In this article, we’ll walk you through the steps to fix damaged walls after wallpaper removal, so you can restore your walls to a smooth, clean finish. Whether you’re dealing with minor imperfections or more significant damage, these tips will help you get your walls back in shape quickly and easily.
Assessing the Damage
After removing wallpaper, it’s essential to assess the condition of your walls before starting any repairs. This step helps you understand the extent of the damage and determine the right approach to fix it. Here’s how you can evaluate the damage and identify the most common issues.
Steps to Evaluate the Extent of Wall Damage
- Visual Inspection: Start by visually inspecting the entire wall. Look for any noticeable imperfections, such as holes, scratches, or areas where the drywall may have torn during wallpaper removal.
- Surface Feel: Run your hand across the wall to feel for any rough or uneven spots that might not be immediately visible. This can help you identify areas that need sanding or filling.
- Lighting Check: Use a flashlight or position a lamp close to the wall, casting light at an angle. This technique can reveal subtle imperfections, such as slight depressions or bumps, that might not be obvious in regular lighting.
- Test for Adhesive Residue: Lightly dampen a sponge and wipe it across the wall. If the wall feels sticky or if the sponge picks up residue, there’s likely leftover adhesive that needs to be removed.
Common Types of Damage
As you assess the walls, you’ll likely encounter a few common types of damage:
- Holes: Small holes from nails, screws, or wall anchors are typical. These are usually easy to fix with some spackling compound.
- Gouges: Deeper cuts or indentations may occur if the wallpaper was removed too forcefully. Gouges require more attention and possibly multiple layers of filler to repair.
- Torn Drywall: In some cases, removing wallpaper can pull off the top layer of drywall paper, leaving the wall surface exposed. This damage needs to be carefully repaired to ensure a smooth finish.
- Adhesive Residue: Sticky residue from the wallpaper adhesive is often left behind. If not thoroughly cleaned, it can prevent paint or new wallpaper from adhering properly.
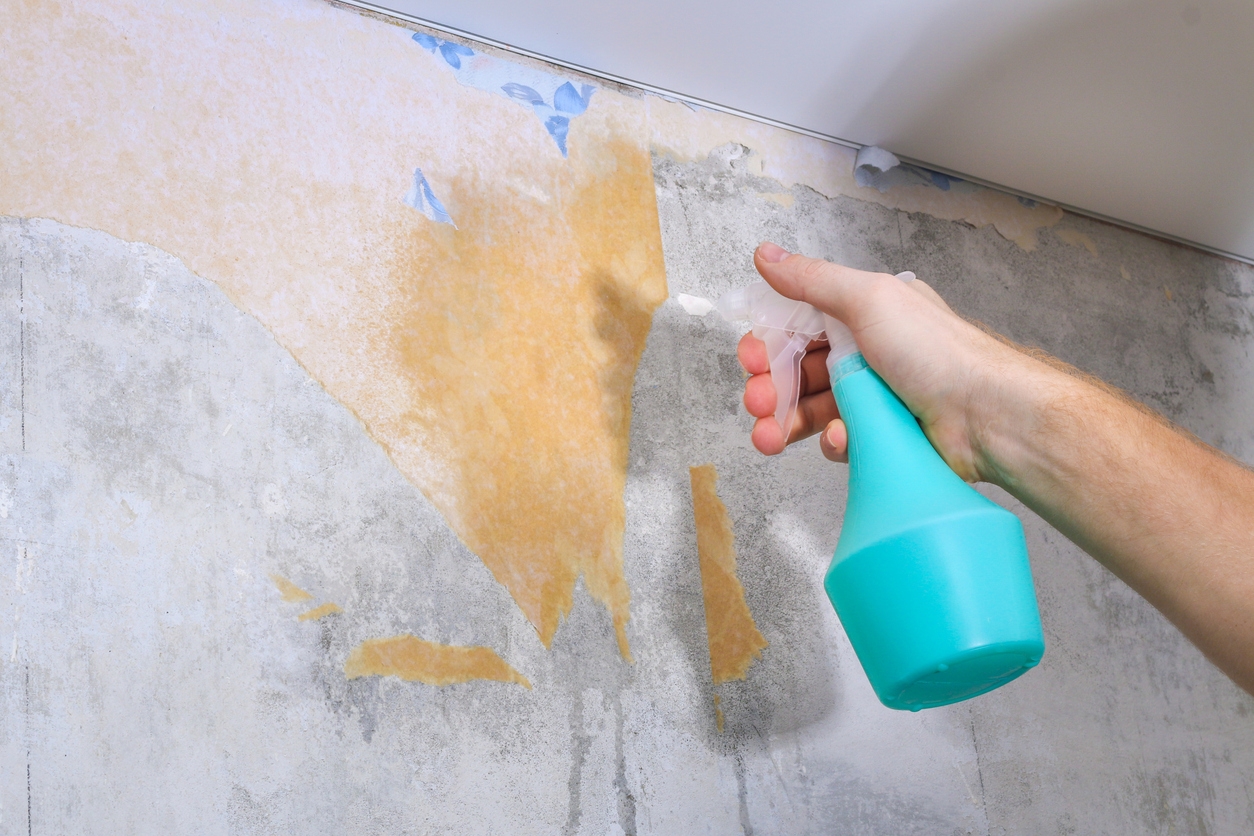
Removing Adhesive Residue
Once you’ve assessed the damage on your walls, one of the first tasks is to remove any leftover adhesive residue. This step is crucial because any remaining adhesive can interfere with paint or new wallpaper application, leading to an uneven or unsatisfactory finish. Here’s how you can effectively remove adhesive residue and the best tools and products to use.
Techniques for Effectively Removing Leftover Adhesive
- Warm Water and Sponge: Start with the gentlest method by using warm water and a sponge. Dampen the sponge with warm water and gently scrub the wall in circular motions. The warmth and moisture will help dissolve the adhesive. This method is ideal for light residue.
- Vinegar Solution: If water alone isn’t enough, mix equal parts white vinegar and warm water in a spray bottle. Spray the solution on the adhesive residue and let it sit for a few minutes. The acidity in the vinegar helps break down the adhesive, making it easier to wipe away with a sponge or cloth.
- Commercial Adhesive Removers: For more stubborn adhesives, you might need a commercial adhesive remover. These products are specifically formulated to dissolve wallpaper glue without damaging the wall. Follow the product instructions carefully, applying it to the residue and allowing it to work for the recommended time before wiping it off.
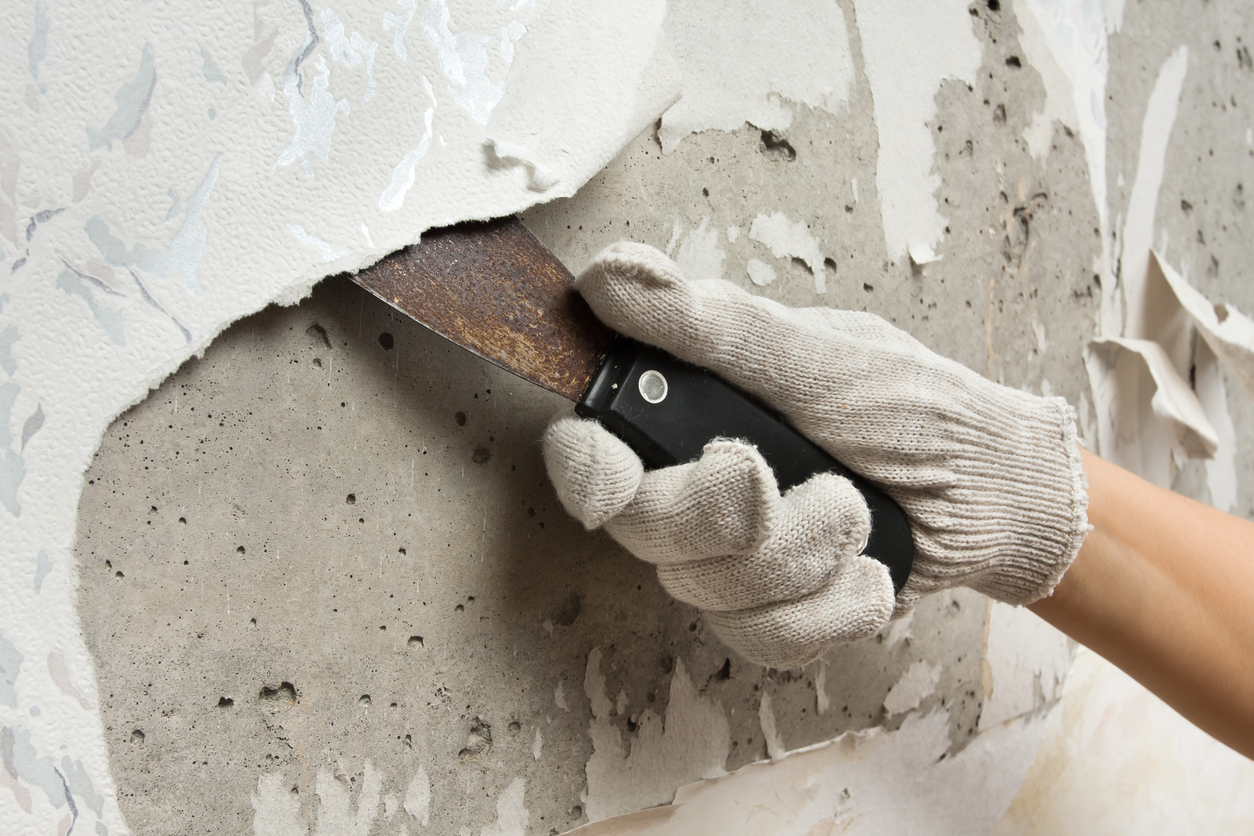
- Scraping with Care: If there are still patches of adhesive that won’t come off, use a plastic scraper to gently scrape away the residue. Be careful not to press too hard, as you can damage the drywall beneath. Use the scraper at a shallow angle to avoid gouging the wall.
- Sanding: For any remaining stubborn spots, lightly sanding the area with fine-grit sandpaper can help. This technique is particularly useful if the residue has hardened. Sanding will smooth out the wall surface, ensuring it’s ready for the next step in your wall restoration process.
Recommended Tools and Products
- Sponge: A regular kitchen sponge works well when applying water or vinegar solutions. Opt for a sponge with a soft side and a slightly abrasive side for more flexibility.
- Spray Bottle: Use a spray bottle to evenly distribute water or vinegar solutions over the adhesive residue. This ensures you don’t over-saturate any one area.
- Plastic Scraper: A plastic scraper is safer than metal alternatives for removing adhesive without damaging the wall. Choose one with a flat, wide edge.
- Vinegar: White vinegar is a natural and effective solution for breaking down adhesive residue. It’s also inexpensive and widely available.
- Commercial Adhesive Remover: Products like Goo Gone or Citristrip are popular choices for tougher jobs. They’re designed to dissolve glue and adhesive without harming the wall surface.
- Fine-Grit Sandpaper: Use sandpaper in the 120- to 220-grit range for light sanding. This will smooth out any remaining residue or rough spots without damaging the wall.
Repairing Holes and Gouges
After removing wallpaper and cleaning up adhesive residue, the next step is to repair any holes and gouges left in your walls. These imperfections can range from tiny nail holes to deeper gouges caused by accidental damage. With the right approach, you can restore your walls to a smooth, even surface. Here’s a step-by-step guide to patching holes and filling gouges, along with tips for achieving professional results.
Step-by-Step Guide to Patching Holes and Filling Gouges
1. Prepare the Area: Before you begin, make sure the area around the hole or gouge is clean and free of any loose debris. You can use a damp cloth to wipe down the area, ensuring it’s ready for repair.
2. Apply Spackle or Joint Compound:
- Small Holes (e.g., nail holes): For small holes, use a putty knife to apply a small amount of spackle directly into the hole. Press the spackle into the hole and then smooth it over with the knife, removing any excess. Allow it to dry according to the product instructions.
- Larger Holes and Gouges: For larger holes or deeper gouges, you may need to use a joint compound. Apply the compound with a putty knife, pressing it firmly into the damaged area. For very deep gouges, it may be necessary to apply the compound in layers, allowing each layer to dry before adding the next.
3. Smooth the Surface: Once the spackle or joint compound is dry, lightly sand the area with a fine-grit sandpaper. This step is crucial for achieving a smooth surface that blends seamlessly with the surrounding wall. Be gentle, as you don’t want to sand away too much of the patch.
4. Check for Imperfections: After sanding, run your hand over the patched area to feel for any uneven spots. If you notice any, apply a second thin layer of spackle or joint compound, allow it to dry, and sand again. Repeat this process until the patched area is completely smooth.
5. Prime the Repaired Area: Before painting, it’s a good idea to prime the patched areas. Primer helps seal the spackle or joint compound, ensuring an even finish when you paint. Use a small brush or roller to apply a coat of primer over the repaired spots.
Tips on Using Spackle or Joint Compound for Smooth Results
- Use the Right Tools: A flexible putty knife is ideal for applying spackle or joint compound. The flexibility allows you to spread the material smoothly and evenly.
- Don’t Over-Apply: When filling holes or gouges, less is often more. Start with a small amount of spackle or joint compound and add more if needed. Over-application can lead to excessive sanding later on.
- Work in Thin Layers: For deeper gouges, apply the spackle or joint compound in thin layers, allowing each layer to dry fully before adding the next. This approach helps prevent the patch from shrinking or cracking as it dries.
- Sanding is Key: Sanding is the most critical step for achieving a smooth, professional finish. Use fine-grit sandpaper and take your time to ensure the patched area blends seamlessly with the surrounding wall.
- Priming Prevents Flashing: Flashing occurs when the patched area appears as a different sheen than the rest of the wall after painting. Applying a primer before painting helps prevent this and ensures a consistent finish.
Smoothing and Sanding the Surface
Once you’ve repaired any holes and gouges in your walls, the next crucial step is smoothing and sanding the surface. Sanding is essential to achieving a smooth, even finish that will look flawless once painted or wallpapered. Neglecting this step can result in visible imperfections that mar the final appearance of your walls. Here’s why sanding is so important and how to do it effectively.
Importance of Sanding for a Smooth, Even Surface
Sanding is the process of leveling out the repaired areas on your wall, ensuring that they blend seamlessly with the surrounding surface. Here’s why sanding is such a critical step in wall repair:
- Eliminates Raised Edges: When you apply spackle or joint compound to fill holes and gouges, it’s nearly impossible to create a perfectly flush surface immediately. Sanding helps eliminate any raised edges, leaving a smooth transition between the patched area and the rest of the wall.
- Prevents Visible Imperfections: Even minor imperfections in a wall can become glaringly obvious once painted. Unsanded patches may stand out as uneven or rough spots, detracting from the overall appearance of the room. Sanding ensures that the wall has a consistent texture so the final finish looks professional.
- Prepares the Surface for Painting: Paint adheres better to a smooth, even surface. Sanding creates a fine texture that helps the paint bond to the wall, reducing the likelihood of peeling or chipping. This is particularly important if you’re applying high-gloss or semi-gloss paint, which tends to highlight any surface imperfections.
- Improves Adhesion of New Wallpaper: If you’re planning to apply new wallpaper, a smooth surface is crucial for proper adhesion. Any bumps or rough spots left from the repair process can prevent the wallpaper from adhering correctly, leading to bubbles or unevenness.
How to Sand Effectively
- Choose the Right Sandpaper: Start with a fine-grit sandpaper, typically between 120 and 220 grit. This range is ideal for smoothing out spackle or joint compounds without damaging the surrounding wall.
- Use Light, Even Pressure: When sanding, apply light and even pressure to the wall. Avoid pressing too hard, as this can create indentations or uneven areas. Move the sandpaper in a circular or back-and-forth motion to blend the patched area with the rest of the wall.
- Focus on the Edges: Pay special attention to the edges of the patched area, where it meets the surrounding wall. These edges are where raised lines or ridges are most likely to occur. Smooth them out carefully to ensure a seamless transition.
- Check Your Work: After sanding, run your hand over the area to feel for any remaining rough spots or inconsistencies. If necessary, sand the area again until it feels completely smooth to the touch.
- Clean the Surface: Once you’re satisfied with the sanding, wipe down the wall with a damp cloth or tack cloth to remove any dust. This ensures that the surface is clean and ready for priming or painting.
Priming the Walls
After repairing and sanding your walls, the next important step is applying a primer. Priming is often overlooked, but it plays a crucial role in ensuring that your paint or wallpaper adheres properly and looks its best. Here’s why priming is essential, along with a guide to choosing the right primer for your project.
Benefits of Applying a Primer Before Painting or Wallpapering
- Enhanced Adhesion: Primer provides a suitable base for paint or wallpaper to adhere to. It creates a slightly porous surface that allows the topcoat to bond more effectively, reducing the chances of peeling or chipping over time.
- Even Surface for Painting: When you paint directly over repaired or uneven areas, the paint can absorb differently, leading to an inconsistent finish. Primer helps to seal the surface, ensuring that the paint goes on evenly, resulting in a smooth, uniform appearance.
- Blocks Stains and Imperfections: If your walls have stains, discoloration, or dark patches, primer helps block these from showing through the final coat of paint. This is especially important when transitioning from dark to light colors or covering up marks left by previous wall treatments.
- Reduces the Number of Paint Coats Needed: Applying a primer can help reduce the number of paint coats required to achieve full coverage. Because primer creates a neutral base, your paint color will appear more accurate and vibrant with fewer layers, saving you time and materials.
- Improves Wallpaper Adhesion: If you’re applying wallpaper, primer is essential to help the adhesive grip the wall evenly. It also makes it easier to remove wallpaper in the future, as the primer helps prevent the adhesive from bonding too strongly with the wall surface.
Types of Primers and How to Choose the Right One for Your Wall
Choosing the right primer depends on the condition of your walls and the type of finish you plan to apply. Here are the main types of primers and tips on selecting the best one for your project:
1. Latex Primer:
- Best For: General interior walls, drywall, and previously painted surfaces.
- Benefits: Latex primer is water-based, making it easy to apply, quick-drying, and low in odor. It’s versatile and works well for most indoor projects. Latex primer is also easy to clean up with soap and water.
- When to Use: Use latex primer for most standard interior projects, especially when working with drywall or over previously painted surfaces.
2. Oil-Based Primer:
- Best For: Stain-blocking, wood, metal, and surfaces that are exposed to moisture or temperature changes.
- Benefits: Oil-based primers provide excellent adhesion and are particularly effective at sealing in stains, tannins, and odors. They’re also durable and moisture-resistant, making them ideal for kitchens, bathrooms, or exterior surfaces.
- When to Use: Choose an oil-based primer if you’re dealing with heavy stains, smoke damage, or prepping surfaces that are prone to peeling or are made of materials like wood or metal.
3. Shellac Primer:
- Best For: Extreme stain-blocking and odor sealing.
- Benefits: Shellac primers are fast-drying and excellent at sealing in odors, such as smoke or pet odors. They also block tough stains like water damage, tannin bleed, and ink.
- When to Use: Use shellac primer for the most stubborn stains and odors, particularly on walls that have been heavily damaged or exposed to smoke or water.
4. Tinted Primer:
- Best For: Transitioning between very different colors, especially from dark to light.
- Benefits: Tinted primers are pre-mixed with a color close to your final paint shade. This helps improve coverage and ensures the final color appears more vibrant and truer than the intended shade.
- When to Use: Opt for a tinted primer when painting over a dark wall with a lighter color or when your final paint color is particularly bold or deep.
5. Multi-Purpose Primer:
- Best For: Versatility across different surfaces.
- Benefits: Multi-purpose primers are designed to work on various surfaces, including drywall, wood, masonry, and previously painted areas. They combine the benefits of different primer types into one product.
- When to Use: Use a multi-purpose primer if your project involves different materials or if you’re looking for a versatile, all-in-one solution.
Choosing the Right Primer for Your Project
When selecting a primer, consider the specific needs of your project:
- Wall Condition: If your walls are heavily stained, discolored, or have been exposed to moisture, an oil-based or shellac primer may be your best option.
- Surface Material: For drywall and previously painted surfaces, latex primer is usually sufficient. For wood, metal, or surfaces exposed to moisture, an oil-based primer is more appropriate.
- Final Finish: Consider the type of paint or wallpaper you’ll be applying. If you’re transitioning between very different colors, a tinted primer can help achieve better coverage and color accuracy.
Conclusion
Repairing damaged walls after removing wallpaper can seem like a big task, but with the right steps, you can restore your walls to a smooth, flawless finish. By assessing the damage, removing adhesive residue, patching holes and gouges, sanding the surface, and applying a quality primer, you’ll be well on your way to beautiful, refreshed walls.
If you need professional help with your wallpaper removal or painting project, contact Custom Painting, Inc. at 925-686-0903 or use our contact form for a consultation. We work in the Bay area including Concord, Antioch, Benicia, Lafayette, Pleasant Hill, Walnut Creek and Vallejo. We’re here to make your walls look their best!
